The Wild Eight Game Walkthrough / Solutions and Completion Guide
Walkthrough – Main Quest Part 1
Once your shelter is down, go punch several trees and an ore mound. You’re pretty much going to follow the tutorial up until the second quest, where it tells you to venture east. Place your workshop close to the shelter, and the campfire as well. The campfire can be a bit further to the east or west because you don’t need two sources of heat overlapping each other. You’ll want to make a pickaxe at this point as well, then chop and chop until you can build the remaining four buildings. You may as well get your mini-base started.
Once your two main buildings are down, go pick up everything you can surrounding the plane. You should be able to find a couple of cans of food, perhaps some berries, maybe even some mushrooms. You should be able to find three to four mushrooms and two or three berries in the immediate area. Cook the mushrooms on the campfire. I’d suggest getting enough wood and ore to upgrade the workshop to level two before you head out so that you can craft the basic protection items. Lastly, make sure you use the shelter and spend any skill points you may have earned (likely mobility and gathering).
Optional: When you die, you lose all your character progress, as well as your main buildings. To help recover, you can build a chest. It shouldn’t disappear when you die, and you can load it up with some resources, a tool or two, some food, and one more item, so you’ll have a bit of an emergency fund, essentially, as you venture out to your corpse (or to wherever you were heading).
When you’re ready to head east, pack up your shelter and workshop; you can only build one of each, so if you venture too far, you’ll always have to come back to where they are to build or upgrade skills. Keep in mind that the buildings maintain their level, so if they’re both level two when you pick them up, they’ll be level two when you place them again. Replacing them does not cost any additional resources.
Quest Objectives:
Build a shelter
Build a workshop
Enter the workshop and craft a stone axe
Equip a stone axe or any other weapon
Build a campfire
Light the campfire
Craft a stick and use the campfire to turn it into a torch
Head to the front of the plane, so the fire is pretty much centered.
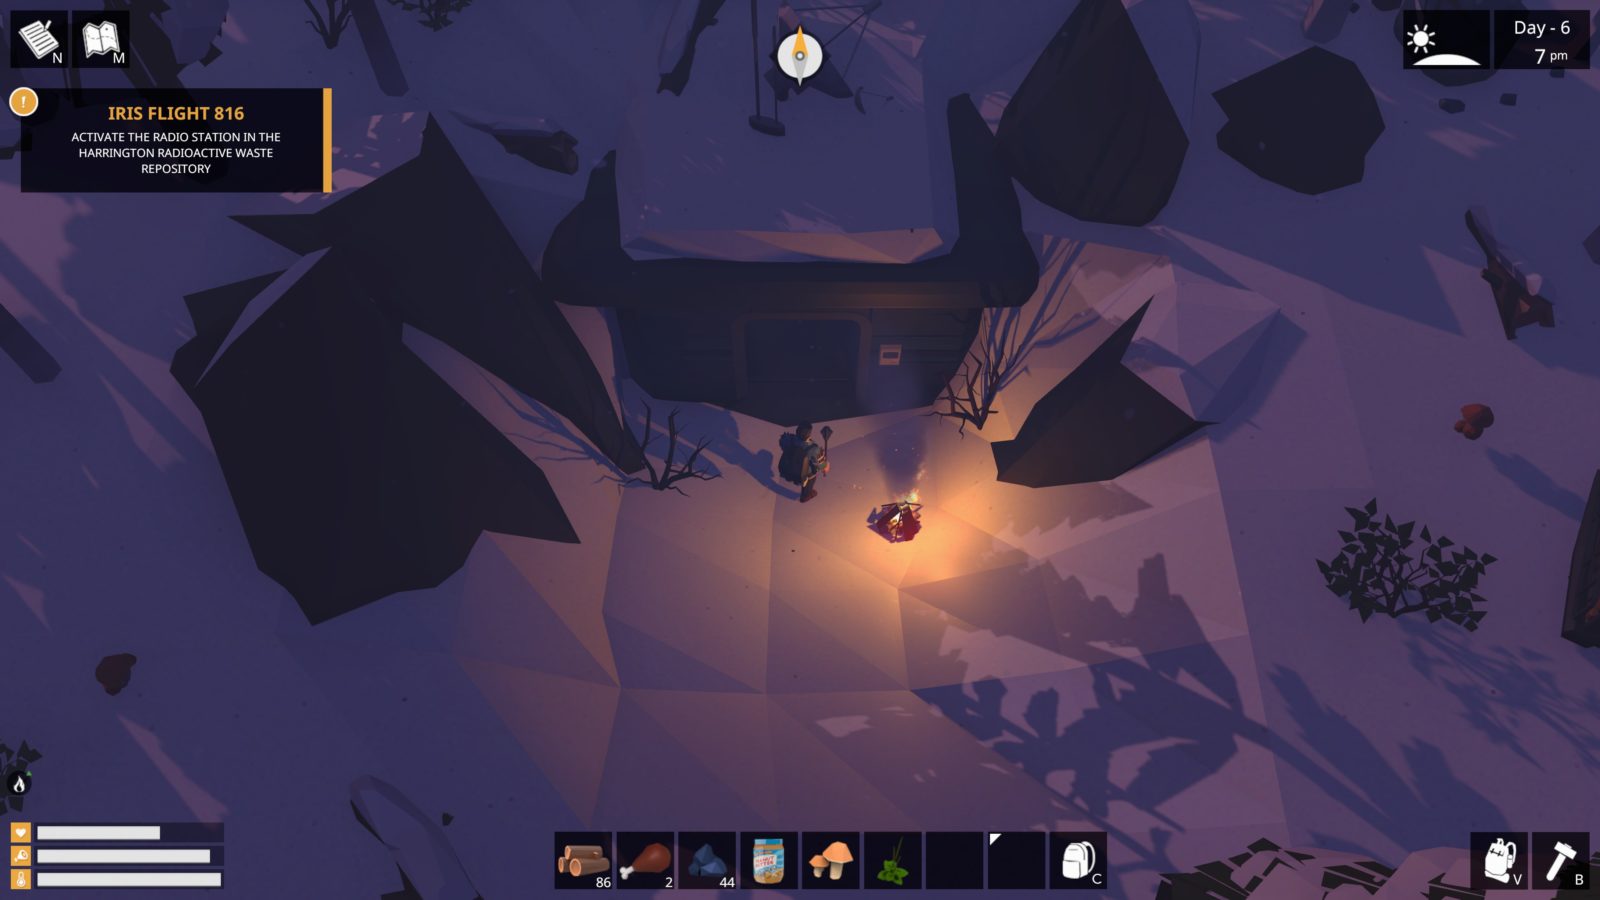
Quest: Iris Flight 816
Overview: Because it’s procedurally generated, I can’t give you exact directions, but just head east and you’ll eventually come across the tail end of the plane on fire. You’ll know you’re in the right area when your screen starts to get brighter.
Go west-east, young man or woman, and you’ll eventually come across the tail end of the plane. It’s usually about three “blocks” of the map, and usually just above you if you’re heading straight east. Your quest will update automatically once you get close.
You can place your workshop and shelter if you want, but I’d recommend a campfire for sure. Pick up the generator, the large box which is quite obviously something special. It will require space in your inventory. Warm-up if you need to, then go slightly southeast of the plane, and you’ll come across a small building. Click on the door to open it and go inside.
This is the radio tower. It will not provide any warmth, so don’t hang around too long. Stick the generator into the console and turn it on. Let there be light! You’ll get a notice that your map has been updated, so if you open it, you’ll see that the entire area has been revealed! This isn’t to say the entire map, but the area immediately surrounding the tower. You’ll notice that the power lines you need to follow will lead into unexplored areas. Be sure to grab the large yellow item to the right of the console, it’s a food ration.
You now need to find where the power lines go. If you noticed on your map, you’ll see three red icons almost directly north; head up there. Be sure to cook some food, or hunt if you need to, get yourself fully warmed up, then pack up the shelter and workshop and head up north toward the power lines.
That about covers your first little bit into the game. If you want to continue following with the walkthrough, feel free to jump to that section. But considering the type of game, the walkthrough will not be exact, and you should also go and explore and attempt to survive on your own, using the walkthrough as a last resort.
Quest: Iris Flight 816
Find out where the power lines go
Once you’re ready to find the power lines, head north. You’ll find them several blocks north and then slightly east.
If you follow them north, you’ll come to a little gated area. From this, continue following. Make sure you stop to hunt, gather, cook, and warm up as necessary! From this point on, I won’t remind you to take care of your stats, as that should be pretty standard by now. You’ll know you’ve reached the end point when your quest updates. To further the quest, you’re probably going to travel north until it curves west, but if you go east, you may come across a building that will have some items inside.
As you continue following, the lines will split off every few substations. Just keep going until you find the correct path. Eventually, you’ll get to the radio station. Set up your camp outside, and make sure you’re adequately protected and have a decent weapon. Remember that because the game is open ended, you can do the quest at any time, you’re not forced to do it all one after the other. I say this because you may be in for a surprise at the next part.
Activate the radio station in the Harrington Radioactive Waste Repository
Head inside, and slowly make your way through the building. There should be a medical kit in the first big room you come across, possibly a weapon as well. Be careful when you get to the large, square-shaped room, as there is most likely a deadly creature in here. It’s Michael J. Fox from Teen Wolf! Not really, but it is a werewolf. You can try to kill it, run from it, do whatever you like. If you can build the iron trap, you can use three or four of them in a line and kite the werewolf into each one, damaging him greatly. However, you choose to proceed, in one of the rooms to the side of this one you’ll find what is a console.
Use it to get a keycard and a quest update. Before leaving, you can get another keycard from the opposite side, which will open a door to a room with a wrench and some food. Leave the building when you’re ready and don’t forget to pack up your warehouse and shelter.
Find out where the second power line goes
If you look at your map, you should see another set of power lines to the northeast, that isn’t connected to the ones you just followed, and continue following them. For me, the target wound up being very east. Again, as the game is procedurally generated, this may mean nothing to you. Eventually, you’ll come across the radio tower.
Walkthrough – Main Quest Part 2
Activate the Hydra-1 Radio Tower using the access key
You’ll eventually come to another fenced-in area, and be careful, because there are bears surrounding it. In addition to the bears, there may also be a polar bear within the enclosure, so keep an eye out.
Assuming you survive, you’ll want to grab the generator that’s in this area, probably to the right of the console. It’ll be tucked in one of the destroyed pieces of the building. Use it on the console, and the area will get brighter; let there be light, they said. Use the console once again, and this uses the keycard you found, which then triggers the next part of the quest.
Reach the bridge
Now comes the final leg of this part of your journey. You’ll want to head all the way to the east, which shouldn’t actually be that far. Your best bet of finding it is to head directly east of the radio tower until you reach the large chunk of ice, then go south one block. It’s here you’ll find a building and a bridge.
Unlock the bridge using the access key
When you get to this new area, you’ll have to fight a man. Well, what used to be a man. I guess he’s a man-beast-abomination hybrid? I don’t know. Either way, you need to fight him, and he drops mutant meat, so clearly he wasn’t a normal man.
But I digress. Once he’s dead, go into the smaller of the two buildings, and use the console to unlock the bridge.
Go over the bridge
You’re almost there! Go to the bridge you just unlocked.
Start crossing the bridge. You’ve finally made it, and have survived what the weird, weird wilderness of Alaska has thrown at you.
Except not really. As you see someone loudly proclaim, before shooting themselves, THERE’S NO WAY OUT OF HERE. Whatever this — thing — is, he’s not friendly, and if you stick around too long, it’s pretty much instantaneous death. Shortly after the attack, he’ll take out the bridge, and… that’s that.
As of right now, this is the end of the game. Whatever remains beyond that bridge is not yet here, and will be available in a future update. If you attempt to continue east, you’ll be stopped by the invisible wall.
If you want to continue doing sidequests, and checking out the various locations, you can head back. The bridge may look destroyed, but you can drop down below it and then come up out from either above or below.
Quest Objectives:
Check out the smoke to the east of the crash ♥♥♥♥. Use your map (M) to avoid getting lost
Look for something useful near the tail of the airplane
Find a place to use the generator
Find out where the power lines go
Activate the radio station in the Harrington Radioactive Waste Repository
Find out where the second power line goes
Activate the Hydra-1 radio tower using the access key
Reach the bridge
Unlock the bridge using the access key
Go over the bridge
Walkthrough – Side Quests
Side quests are denoted by the blue circle with an exclamation mark in it. I can’t tell you where they are exactly, because they’ll be in a random spot each time. Despite their random location, the actual content of the quest will remain the same.
Shadows in the Night
You found a walled-in warehouse whose gate only opens at a certain time. Get inside and explore it.
You need to get into the warehouse. The gate is around the southeast and will be closed between 6:00 pm and 10:00 pm. If you try to open it during these hours, you’ll get nowhere. Come anytime other than those hours and you’ll be able to activate it.
Once inside, you’ll need to find a keycard, which should be on the west side of the enclosure. It was on a box for me. While trying to find it, you’ll need to contend with these weird, purple ghost things. They can’t be hurt (that I noticed), but you can run away from them pretty easily.
Once inside the building, you can collect a few items and possibly read up on some backstory.
Quest Objectives
Get inside the warehouse area
Restart the generator to turn the lights back on
The Wrong Place at the Wrong Time
You discovered a crashed helicopter with a man standing next to it. Find out what happened.
This will be a fenced area with a crashed helicopter and a building requiring a generator to get into. Generators can be found at random spots with a green hangar door icon.
Once you approach the helicopter, the man is actually a mutant and will come out and attack you. He’s a good fight, so be prepared to stun and run away if you need to. Once dead, put the generator into the red square to unlock the door, then go inside the building. There will also be a note outside that you can read, that will help tell the story.
Not much to do in here, and simply entering the building will trigger the completion of the quest. At the back of the room, you’ll likely find a crowbar and a yellow helmet.
Quest Objectives
Approach the man by the helicopter
Find out what happened to the man from the helicopter
Determine the cause of the mutation inside the building
Prisoners
While wandering near the entrance to the DEF-1 Testing Site you heard a message saying that five people were trapped somewhere inside. Try to save them.
You’ll get this quest once you see some dialogue appear at the bottom of the screen. It’s a message, on loop, from a group of survivors who are low on food and are looking for help. If you follow the snow as it slopes downward, you’ll come across a building.
Once inside, explore and make your way around. At some point you’ll come across a door blocked by rubble, and you need to clear it. At the far end of the building, there will be a turret that you can access. The computer in the room just to the north of the turret will allow you to select between a machine gun mode, or machine gun plus rocket launcher. You can use it now if you want, but the turret won’t do anything.
In this room here, activate the box to build a turret target, then go back to where the blockage was and put the target in front. Return to the box, build another target, and place it in the hallway leading to the blockage, somewhere in the middle. If going by the above image, you can place it nearby the second door on the far right side of the picture. Go back to the room and activate the turret. The machine gun will destroy the first target, and the rocket will take out the second target, as well as the blockage. The reason you needed two targets is because the target near the blockage would be out of range.
Quest Objectives
Find the entrance to the DEF-1 Testing Site
Find the room where the people are trapped
Find a way to clear the blockage
Treasures of the Food Warehouse
You found a warehouse that looks quite large, but its garages are locked. Find a way to open them.
When you come across this large building, you’ll find two garage doors, as well as a basic door. You’ll want to go in the normal door.
From the above image, go to your left, which will take you down a set of stairs into the basement.
The basement is pretty straightforward. There will be a couple of hallways and two locked doors. You’ll want to make your way through the hallways until you get to a dead-end with what appear to be breakers on the wall.
Use the breaker on the left, and this will open the garage doors. It’ll also open one of the doors in the hallway, which has a mutant inside. You can either kill him or run upstairs, he shouldn’t follow, but if you’re in need of meat or supplies and you won’t die, then go ahead and kill him. The other door also has a mutant inside. When you’re ready, go back upstairs, leave the building, then go around the side and go through one of the garage doors.
Inside, you’ll find tons of food items, as well as some syringes. The super muffins in the second warehouse refill a pretty good amount of health, and there are five of them, so take them and enjoy the feast.
Quest Objectives
Find out whether or not there is a way to infiltrate the warehouse
Go down to the basement of the warehouse
Find a way to unlock both gates of the warehouse garages
Go up and find out what is in the garages
Lost Future
You’ll come across a large area that’s comprised of many buildings. You’ll know it’s a special area because there will be not one or two, but four blue circles to denote it.
Once you start exploring, you’ll find a few notes that will fill you in more on what’s happened in this wretched land. You’ll also trigger a quest update when you get near the main building, which is a long garage filled with green toxic smoke. At the top end of this room, you’ll see a hatch. It’s not usable, but you should throw something down there. Pretty much any item will work, as long as it is not a throwing stone.
Once you do this, a man will emerge. This man is Isaac, and he wants to be your friend. By which I mean he wants to eat your face. So, don’t let that happen and kill the poor guy. Collect his meat and items and enjoy a quest completion.

